
Minesweeper Game With Arduino
This is an Arduino project to simulate Minesweeper game with Arduino UNO board and the Nokia 5110 screen.
The Minesweeper is the mythical game that was ported to Microsoft Windows. The origin of this game goes back to the decade of the sixties and seventies and has been reproduced in numerous platforms, although it would not reach its fame until the adaptation made for Windows by Robert Donner.
Parts and Materials
Things that you’ll need:
- Arduino UNO (a clone works fine)
- 1 x Graphic LCD 84x48 - NOKIA 5110
- 1 x Buzzer
- 1 x LED
- 3 x Pushbuttons
- 1 x Analog Thumb Joystick
- Jumper Cables
- Breadborad (protoboard)
- 1 x USB cable
- Resistors:
- 7 x \(10k\Omega\)
- 1 x \(1k\Omega\)
- 1 x \(330\Omega\)
- 1 x \(47\Omega\)
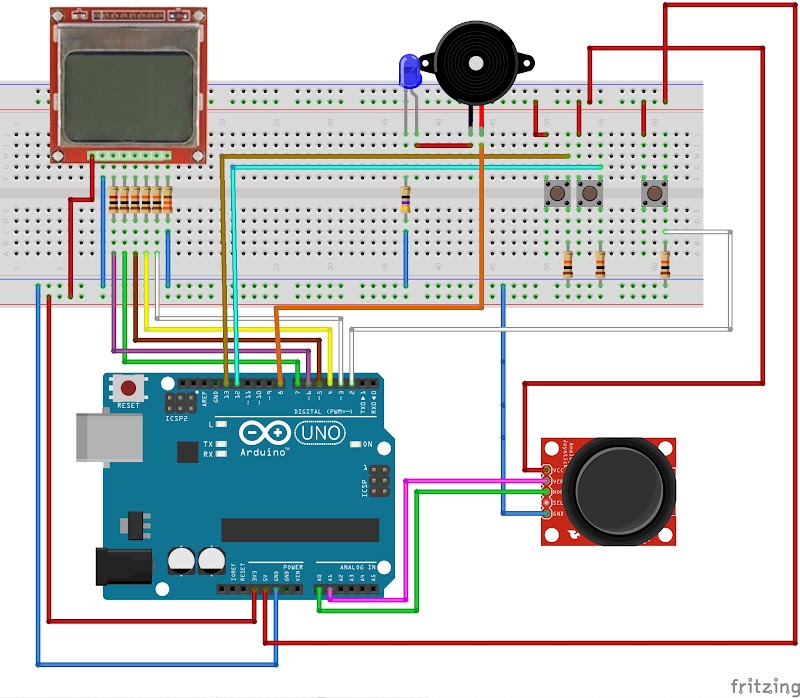
Assembling the Parts
Start off with the Arduino unpowered.
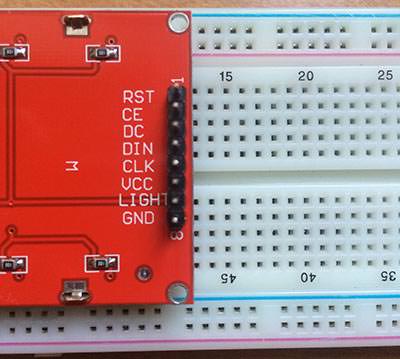
The Nokia 5110 LCD module has 8 pins, as shown in the picture above.
| Pin | Description | Resistor |
|---|---|---|
| RST | Resets the display | \(10k\Omega\) |
| CE | Chip selection that activates the display controller | \(1k\Omega\) |
| DC | Data/Commands choice | \(10k\Omega\) |
| DIN | Serial data input | \(10k\Omega\) |
| SCLK | Serial clock | \(10k\Omega\) |
| VCC | Supplies power for the LCD from 2.7V to 3.3V (Do not use 5V) | - |
| LIGHT | Controls the backlight of the display | \(330\Omega\) |
| GND | Ground | - |
Just add \(10k\Omega\) resistors between the RST, DC, DIN and SCLK pins and a \(1k\Omega\) resistor between CE. Then, the backlight(LIGHT) pin is connected to 3.3V via \(330\Omega\) resistor.
Finally, we connect the rest of the components:
- LED and buzzer are connected in serie with a \(47\Omega\) resistor.
- Buttons are connected to the Arduino board with a resistor of \(10k\Omega\).
- Analog Thumb Joystick is connected to the board.
Programming the Arduino
At this point, you should be ready to program the Arduino and test it out. But before we start coding we need to install the PCD8544 LCD controller. Adafruit PCD8544 will allow us to talk to the Nokia 5110 display with simple commands.
Additionally we can also install Adafruit GFX Library which provides a set of shapes (points, lines, circles, etc.) to create our own designs.
Download Source Code from this repository
Connect the Arduino to your computer using the USB cable. This will provide power to the Arduino/game and allow you to upload your program to the Arduino.
Finally, load the code on the Arduino board by selecting File, Upload. You should see two welcome screens and the game starts after six-seconds!